Tuesday 6 November 2012

Catch us tomorrow: Channel 106 1030pm Hypp TV #Blogshop


Dear Cuppycatcake readers,

I'm sorry for the lack of updates, been hellaya busy with lots of things on top of baking of course. 

Anyway, among of the BIGGEST update/move/step of my little cakeymajingy:


Thanx to EC Inspirasi Channel for giving us a slot on BlogShop!
A little background: EC Inspirasi is a channel (channel 106) on Hypp TV, and i'm sure all UnifFi subscribers are aware of Hypp TV. HyppTV is a pay TV service containing varietiy of content (entertainment, sports etc) 
and delivered  through the high speed internet broadband, UniFi. 

Tune in to channel 106, Hypp TV
tomorrow, Wednesday 7th November 2012 1030pm!

So what are you waiting for? Key in your reminder. NOW!!
Will update more on this slot soon.
p/s: I am preparing many many updates soon with variety of recipes! 

Friday 21 September 2012

Mint Choc Chip Cake


What's your favorite ice cream flavor? Mine is either strawberry or mint chocolate chip! I cant get enough of those. To me, Baskin Robbin's is still the best, coz they are very generous with the choc chips (or rather pieces of chocolates) and its not too milky as some other brands.

The first time I lay my eyes on this cake was on raspberricupcakes. It was one of her top recipe. I couldn't get my mind of it, but the idea of making it was put on hold for a couple of months, as I thought not many are keen to minty flavor.
Awan was turning 26, and we planned a small iftar celebration. I decided to do small version of this greeny yummy cake. The best thing bout this cake is you can alter the minty taste according to your preference. Swipe those fingers while the buttercream is zapping in the mixer till you are satisfied.

For the chocolate cake, I used glorioustreats' perfectly chocolate cupcake recipe:
2 cups sugar
1 3/4 cups all purpose flour
3/4 cup unsweetened cocoa (best quality available)
1 1/2 teaspoons baking powder
1 1/2 teaspoons baking soda
1 teaspoon salt
2 eggs
1 cup whole milk (sometimes I substitute this with buttermilk!)
1/2 cup vegetable oil
2 teaspoons vanilla extract (best quality available)
1 cup boiling water

  1. Preheat oven to 175*C
  2. In a large mixing bowl, stir sugar, flour, cocoa, baking powder, baking soda and salt.
  3. Add eggs, milk, oil and vanilla.  Beat on medium speed for one minute or until just combine
  4. Stir in boiling water (the batter will be thin, don’t worry, this is right).
  5. Divide the batter into 3 9inch tin (or 2, whatever your heart desire).
  6. Bake the cake until your cake tester comes out clean.
  7. Cool before frosting.
Note: The above measurement will give you HUGE/TALL cake. I halved the recipe to get the size above.

Mint Chocolate Chip Buttercream
1 cup of butter
1 cup of vegetable shortening
Icing sugar
3 teaspoon peppermint flavor (or according to your preference)
Green coloring
1 cup chopped chocolate chips


  1. Cream butter and shortening until fluffy.
  2. Add icing sugar until you reach you desired level of sweetness (I usually put in 3/4 cup)
  3. Add in the peppermint flavor.
  4. Add in few drops of green coloring until it is evenly incorporated.
  5. Add in chopped choc chips. Tadaaaaa

Fill and frost the cake with the mint choc chip buttercream. My choc chip was not thoroughly crushed, so I get bumpy-ish frosting, which makes it even more tempting..haha...


Good luck!!

Wednesday 29 August 2012

Chocolate Chocolate Cookie


First entry on cookies! It was all a crave. That's why I made these cookies. Especially after reading few entries from The Baker Chick and Sweet Peony. I can literally smell chocolate just by looking at the pictures!


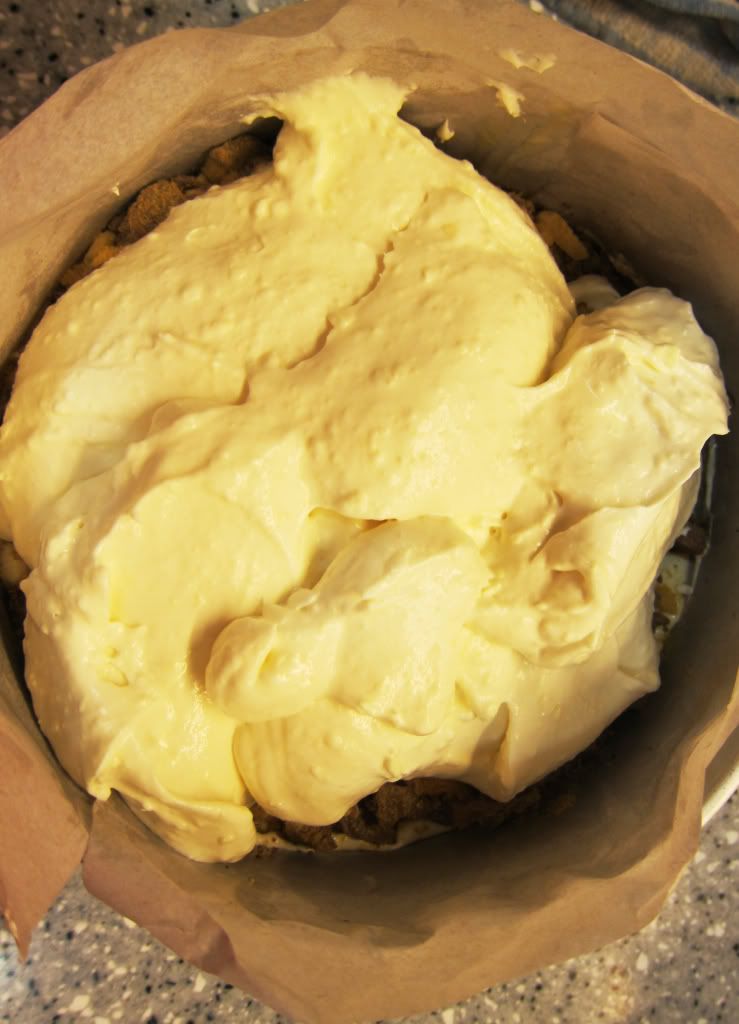
Its not the typical u-gotta-roll-and-use-cookie-cutter-etcetc. But, the whole process takes longer as you need to chill the dough before you bake it (gotta bake them chilled). You know you usually put in nuts or choc chips in your cookies? This one is lil different, you include DIY cookie crumble that you have to make few hours earlier (a day earlier would be better).

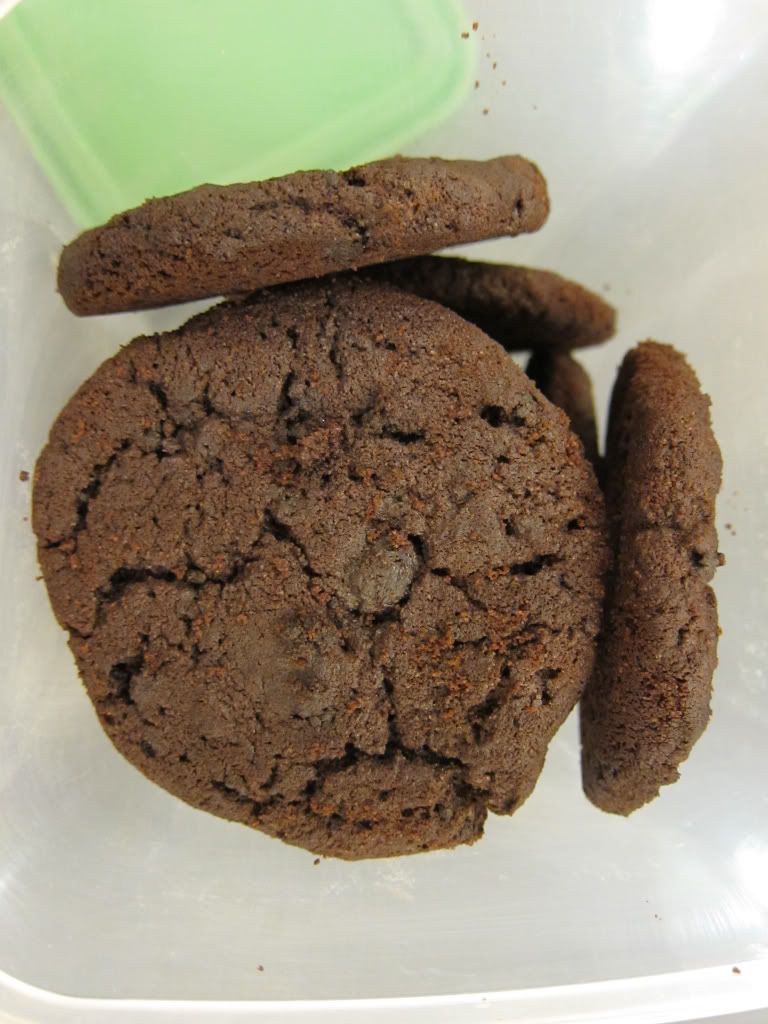
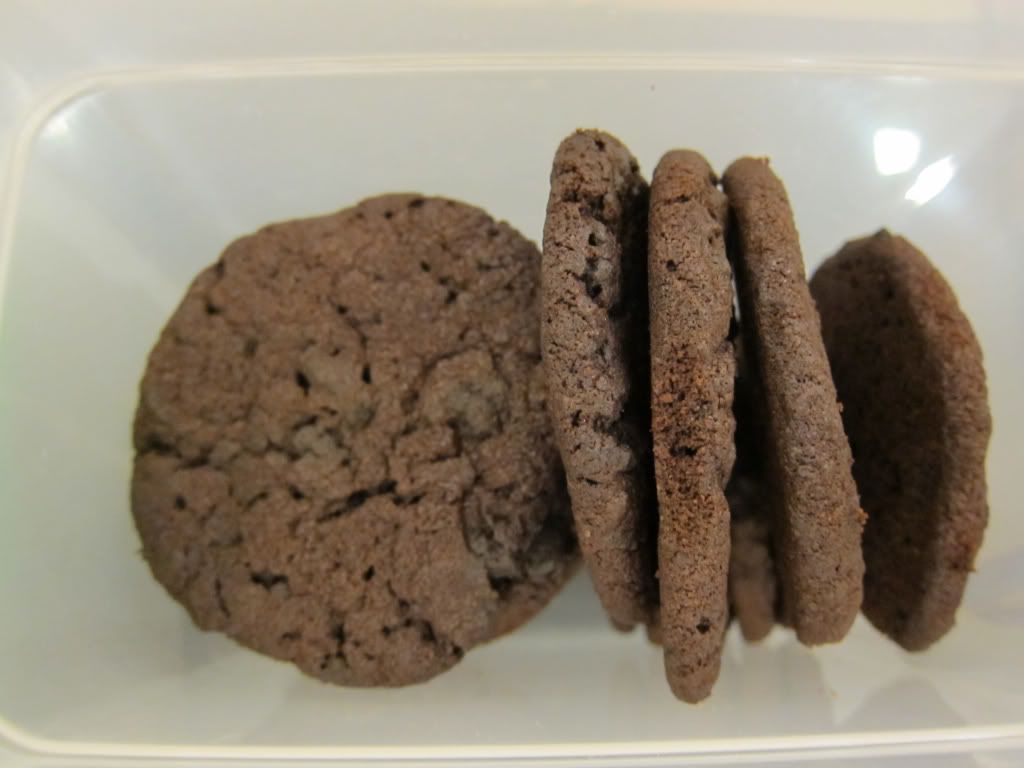
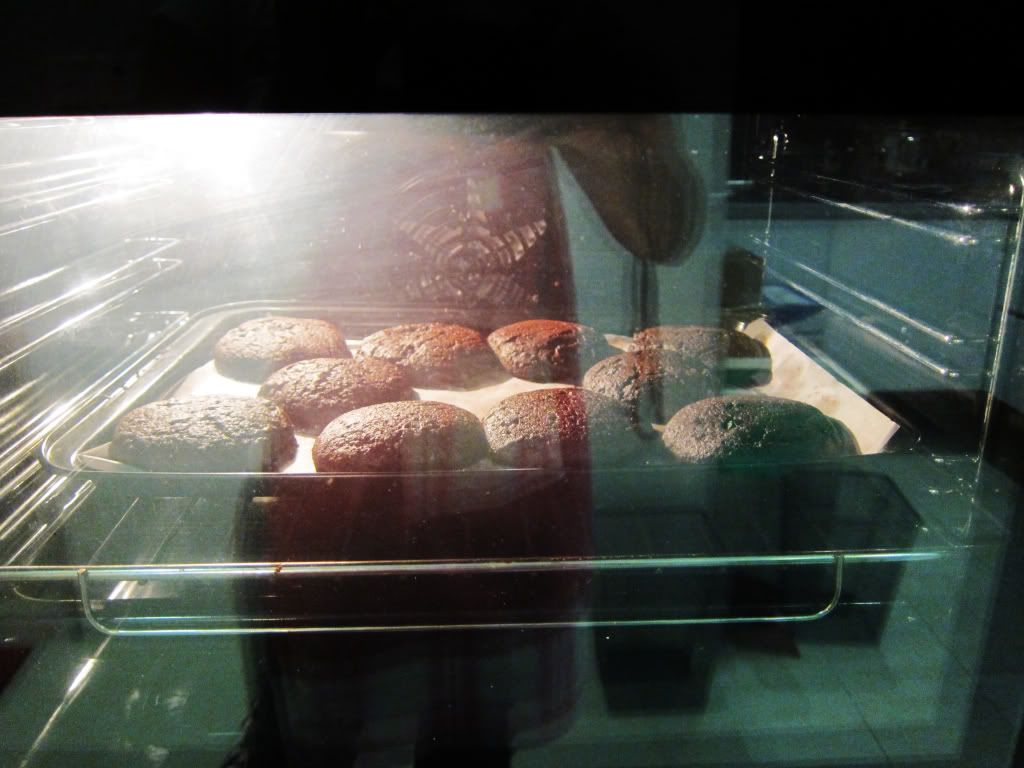
The first time I made this, had no patience in arranging the dough far apart, and I made HUGEEEEEEE round dough, when baked, all my cookies looked like they went into a packed bus, squeezing for space and some became a bit oval shaped. Haha. Next batch I arranged them properly and each got enough space to grow big. Its huge!


Put one into my mouth, couldn't stop eating. It was the best chocolate cookie I ever tasted (so far). So chocolatey, perfect combination of sweet and salty (from the crumble). Made another batch for Eid, smaller size, everything was gone within few days. (Am surprised it lasted that long, as BIL usually hide some away).

My girlfriends couldn't stop eating it, and some nearly get into a catfight for the last piece! Felt guilty for not bringing it more. I even had some request for Eid orders, but fasting is just tiring on top of other orders as well, so I am making a pack soon so you can purchase these babies in small containers! (Soon, soon ;))

The recipe was from a book called Momofuku Milk Bar and some baker bloggers will make the same recipe and give reviews on it. You can see who made this in some post here. The original post on the recipe was from Bake your Day.

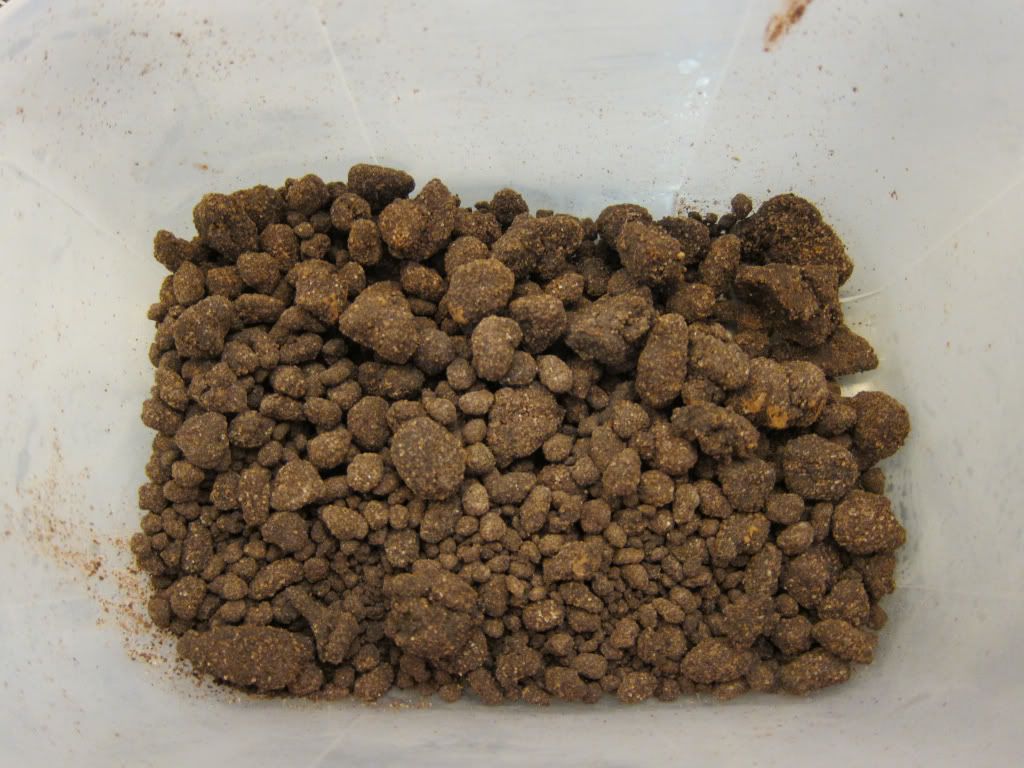
for the chocolate crumb:
(you will need this for the dough, reccomended to do this one day before and refrigerate)
2/3 cup flour
1 tsp. cornstarch
1/2 cup sugar
2/3 cup cocoa powder
1 tsp. kosher salt
6 Tbs. butter, melted

  1. Pre-heat the oven to 150 degrees Celcius.
  2. Combine the flour, cornstarch, sugar, cocoa powder, and salt in the bowl of a stand mixer fitted with the paddle attachment and mix on low speed until combined.
  3. Add the melted butter and mix on low until small clusters begin to form.
  4. Spread the clusters on a parchment. Bake for 20 minutes, breaking up the pieces as needed. The crumbs should still be slightly moist to the touch, they will harden as they cool.
  5. Allow the crumbs to cool completely before using (or eating!) Store in an airtight container for up to 1 week at room temperature, or up to 1 month in the fridge.
for the cookie dough: 1 cup butter, room temperature
1 1/2 cups sugar
1/4 cup glucose
1 egg
1/4 tsp. vanilla extract
2 ounces 55% chocolate, melted
1 1/4 cups bread flour
3/4 cup cocoa powder
3/4 teaspoon baking powder
1/4 teaspoon baking soda
1 3/4 teaspoon kosher salt
1 1/4 cup chocolate crumb

  1. In the bowl of a stand mixer fitted with a paddle attachment, combine the butter, sugar, and glucose and cream together on medium-high speed for 2 to 3 minutes. Scrape down the sides of the bowl, and add the egg, vanilla, and melted chocolate, and beat for 7 to 8 minutes.
  2. Reduce the mixer speed to low and add the flour, cocoa powder, baking powder, baking soda, and salt. Mix just until the dough comes together, no longer than 1 minute. (Do not walk away from the machine during this step, or you will risk overmixing the dough.) Scrape down the sides of the bowl.
  3. With the mixer still on low speed, add the chocolate crumbs and mix just until incorporated, about 30 seconds.
  4. Using a 2 3/4-ounce ice cream scoop (or a 1/3-cup measuring cup), portion out the dough onto a parchment-lined sheet pan. Pat the tops of the cookie dough domes flat. *you can also make smaller size dough, which will require lesser baking time.
  5. Wrap the sheet pan tightly in plastic wrap and refrigerate for at least 1 hour, or up to 1 week. Do not bake your cookies from room temperature–they will not bake properly.
  6. Pre-heat the oven to 190 degrees Celcius.
  7. Arrange the chilled dough a minimum of 4 inches apart on parchment. Bake for 18 minutes. The cookies will puff, crackle, and spread. If after 18 minutes, the cookies still seem doughy in the center, give them another 1 minute in the oven, but not more. *if you make smaller size, bake for around 12-15 minutes. I burnt some of mine (the smaller size batch), but it was still yummy if you like burnt-like cookies.
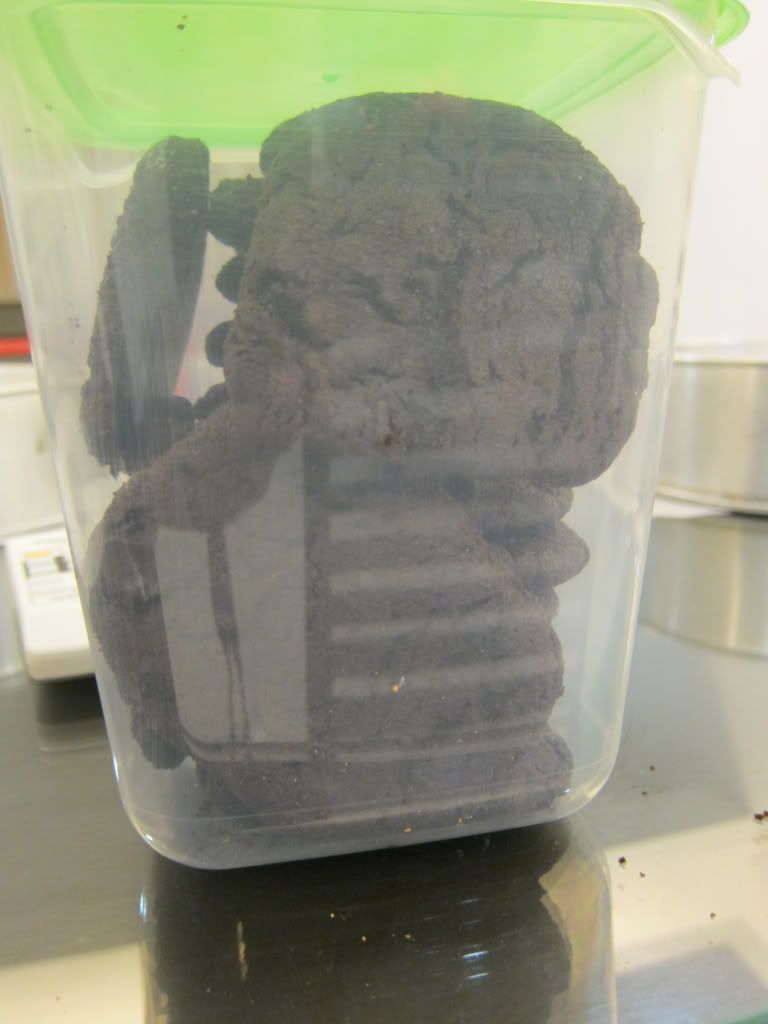
  8. Cool the cookies completely on the sheet pans before transferring to a plate or an airtight container for storage. At room temp, the cookies will keep fresh for 5 days; in the freezer, they will keep for 1 month.
**Bake Your Day Notes:I baked my cookies for exactly 18 minutes and they came out perfectly but watch in the last few minutes so that you don’t overbake them.
I followed the recipe exactly as written for these and we adored them. I wouldn’t change anything for the next time that I make them.

There you go. Good luck!

xoxo

The Fancy Pants Cheesecake


Nabilah had been craving for this cake since the first time I told her about it. She tried her hardest to find an event so that she can have the cake. Months. It took her months, till it was her baby sister's birthday!

The recipe is from Kate Shirazi, got her book as my birthday gift (Thank you Yong!).The original recipe had banana as its middle layer.Nabilah suggested to have something choclatey in the centre (she and her baby sister and some (un)lucky friends of thiers got to be my test mouse). Eventually, another birthday of a dear friend was due. Another experiment! yeay! I decided to dig into my  the fridge, and found some crunchie! Used crunchie to substitute the banana.


And I got to taste this one! I rarely eat the cakes that I made, but gurrrrlllll, this is good. Sweet, creamy, perfect for a quick fix for your sweet tooth. Not to mention the maltessers! Yummssss.

Recipe follows (with lil modification of Kate's version):
1/2 cup of original digestive biscuits (or hobnobs/graham crackers)
1/2 cup of oreo crunch (or any choc hobnonbs/graham crackers/digestive)
1/4 cup butter-melted
3/4 cup whipped cream
250gram cream cheese
1 teaspoon vanilla extract
100gram maltessers

Centre Layer
You can choose any fruits or any candy bar as you wish.
For banana, I used 1 1/2 - 2 large size banana, slice them up and pour lemon juice on top of it to avoid them from browning.
For crunchie, I used 1 1/2 bar, crushed to small pieces.
  1. Line and butter a 7inch springform tin, bottom and side.
  2. Crush digestive and oreo (using your hand or mixer or just stomp it with your roller pin in a plastic bag).
  3. Combine digestive and oreo with melted butter.
  4. Pressed the cookie mix at the bottom of the tin with the back of a spoon so it'll be really pressed. Refrigerate for 1 hour.
  5. Whip the the whipped cream with an electric mixer (top speed) until soft peak forms.
  6. Meanwhile give your cream cheese a gentle beating until it is smooth (spreadable form is the best).
  7. Fold in the cream cheese to the whipped cream or you can just mix the cream cheese into the whipped cream mixture until just combine.
  8. Insert vanilla extract. 
  9. Take half of the cheese mixture and spread evenly on top of the cookie base.
  10. Spread the centre layer (crunchie, banana or anything you wish).
  11. Spread the other half of the cheese mixture on top of the centre layer.
  12. Refrigerate for at least 3 hours (best overnight).
  13. Arrange the maltessers as you wish.
*Double the recipe for a 9inch tin!


Voila! Easy ay?  You can try having them with strawberries, mango etc. You can even substitue the maltessers to some other candy or choc!

Have fun dolls!

Laters. xoxo.