Wednesday, 29 August 2012

Chocolate Chocolate Cookie


First entry on cookies! It was all a crave. That's why I made these cookies. Especially after reading few entries from The Baker Chick and Sweet Peony. I can literally smell chocolate just by looking at the pictures!


Its not the typical u-gotta-roll-and-use-cookie-cutter-etcetc. But, the whole process takes longer as you need to chill the dough before you bake it (gotta bake them chilled). You know you usually put in nuts or choc chips in your cookies? This one is lil different, you include DIY cookie crumble that you have to make few hours earlier (a day earlier would be better).

The first time I made this, had no patience in arranging the dough far apart, and I made HUGEEEEEEE round dough, when baked, all my cookies looked like they went into a packed bus, squeezing for space and some became a bit oval shaped. Haha. Next batch I arranged them properly and each got enough space to grow big. Its huge!


Put one into my mouth, couldn't stop eating. It was the best chocolate cookie I ever tasted (so far). So chocolatey, perfect combination of sweet and salty (from the crumble). Made another batch for Eid, smaller size, everything was gone within few days. (Am surprised it lasted that long, as BIL usually hide some away).

My girlfriends couldn't stop eating it, and some nearly get into a catfight for the last piece! Felt guilty for not bringing it more. I even had some request for Eid orders, but fasting is just tiring on top of other orders as well, so I am making a pack soon so you can purchase these babies in small containers! (Soon, soon ;))

The recipe was from a book called Momofuku Milk Bar and some baker bloggers will make the same recipe and give reviews on it. You can see who made this in some post here. The original post on the recipe was from Bake your Day.

for the chocolate crumb:
(you will need this for the dough, reccomended to do this one day before and refrigerate)
2/3 cup flour
1 tsp. cornstarch
1/2 cup sugar
2/3 cup cocoa powder
1 tsp. kosher salt
6 Tbs. butter, melted

  1. Pre-heat the oven to 150 degrees Celcius.
  2. Combine the flour, cornstarch, sugar, cocoa powder, and salt in the bowl of a stand mixer fitted with the paddle attachment and mix on low speed until combined.
  3. Add the melted butter and mix on low until small clusters begin to form.
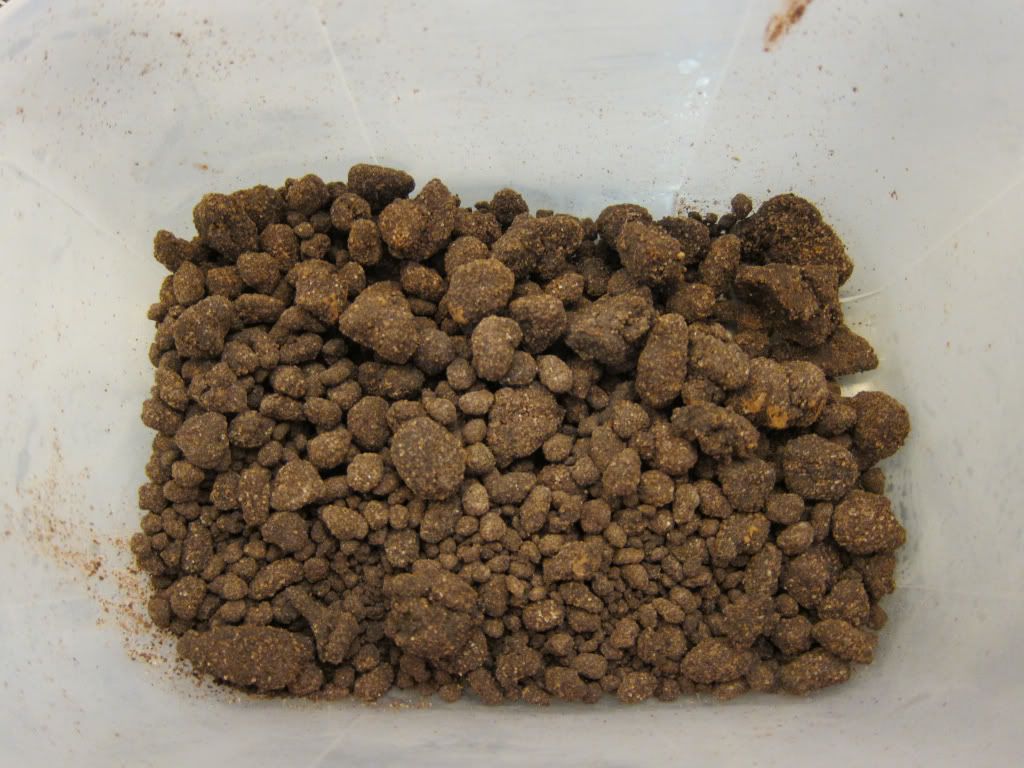
  4. Spread the clusters on a parchment. Bake for 20 minutes, breaking up the pieces as needed. The crumbs should still be slightly moist to the touch, they will harden as they cool.
  5. Allow the crumbs to cool completely before using (or eating!) Store in an airtight container for up to 1 week at room temperature, or up to 1 month in the fridge.
for the cookie dough: 1 cup butter, room temperature
1 1/2 cups sugar
1/4 cup glucose
1 egg
1/4 tsp. vanilla extract
2 ounces 55% chocolate, melted
1 1/4 cups bread flour
3/4 cup cocoa powder
3/4 teaspoon baking powder
1/4 teaspoon baking soda
1 3/4 teaspoon kosher salt
1 1/4 cup chocolate crumb

  1. In the bowl of a stand mixer fitted with a paddle attachment, combine the butter, sugar, and glucose and cream together on medium-high speed for 2 to 3 minutes. Scrape down the sides of the bowl, and add the egg, vanilla, and melted chocolate, and beat for 7 to 8 minutes.
  2. Reduce the mixer speed to low and add the flour, cocoa powder, baking powder, baking soda, and salt. Mix just until the dough comes together, no longer than 1 minute. (Do not walk away from the machine during this step, or you will risk overmixing the dough.) Scrape down the sides of the bowl.
  3. With the mixer still on low speed, add the chocolate crumbs and mix just until incorporated, about 30 seconds.
  4. Using a 2 3/4-ounce ice cream scoop (or a 1/3-cup measuring cup), portion out the dough onto a parchment-lined sheet pan. Pat the tops of the cookie dough domes flat. *you can also make smaller size dough, which will require lesser baking time.
  5. Wrap the sheet pan tightly in plastic wrap and refrigerate for at least 1 hour, or up to 1 week. Do not bake your cookies from room temperature–they will not bake properly.
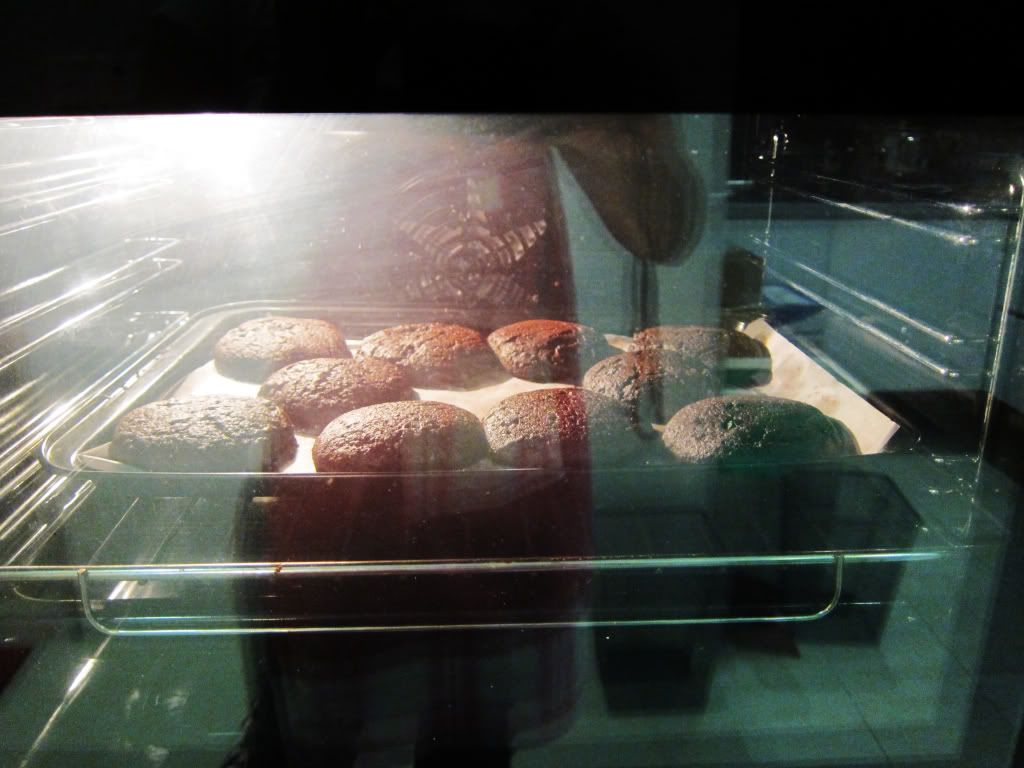
  6. Pre-heat the oven to 190 degrees Celcius.
  7. Arrange the chilled dough a minimum of 4 inches apart on parchment. Bake for 18 minutes. The cookies will puff, crackle, and spread. If after 18 minutes, the cookies still seem doughy in the center, give them another 1 minute in the oven, but not more. *if you make smaller size, bake for around 12-15 minutes. I burnt some of mine (the smaller size batch), but it was still yummy if you like burnt-like cookies.
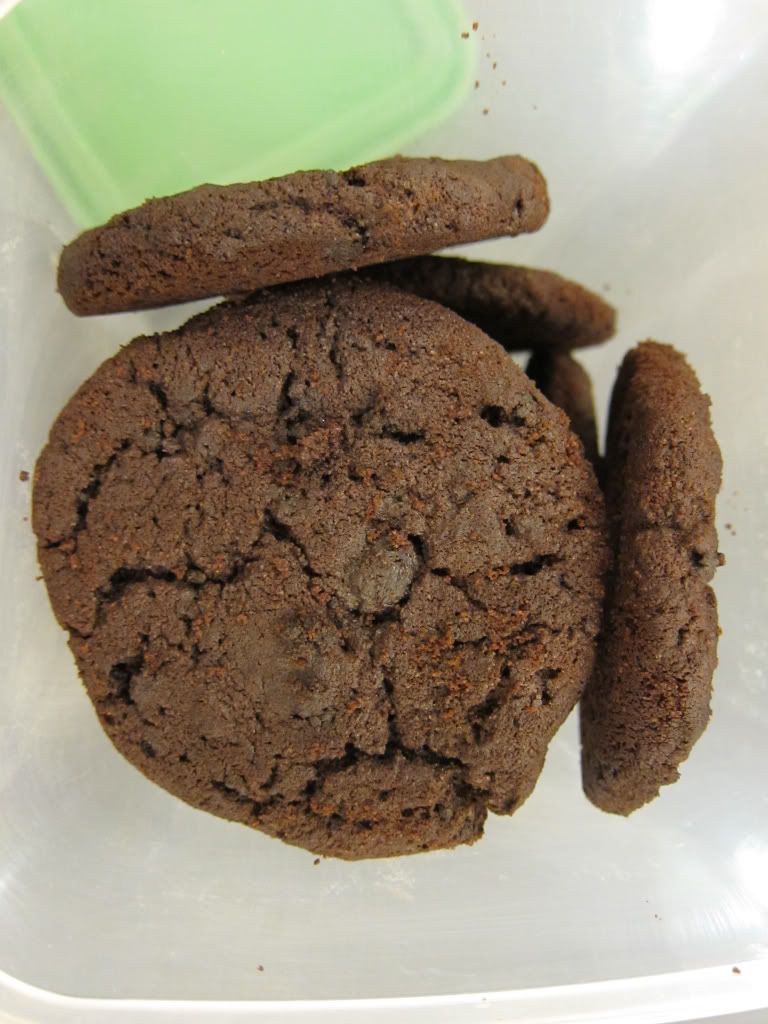
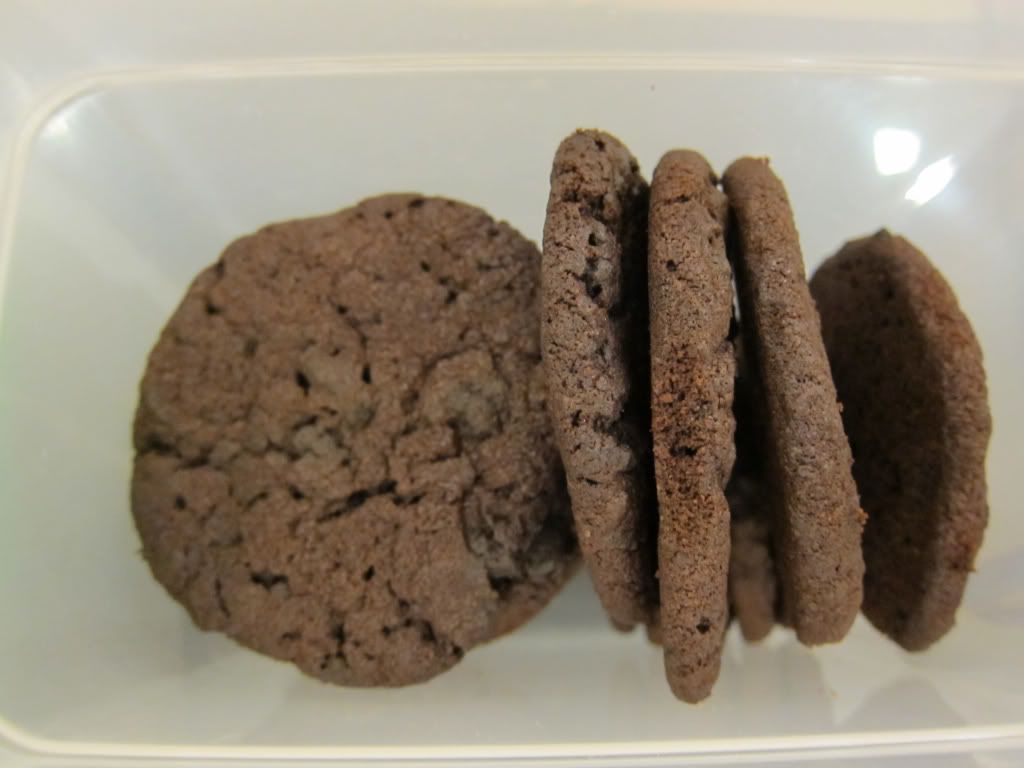
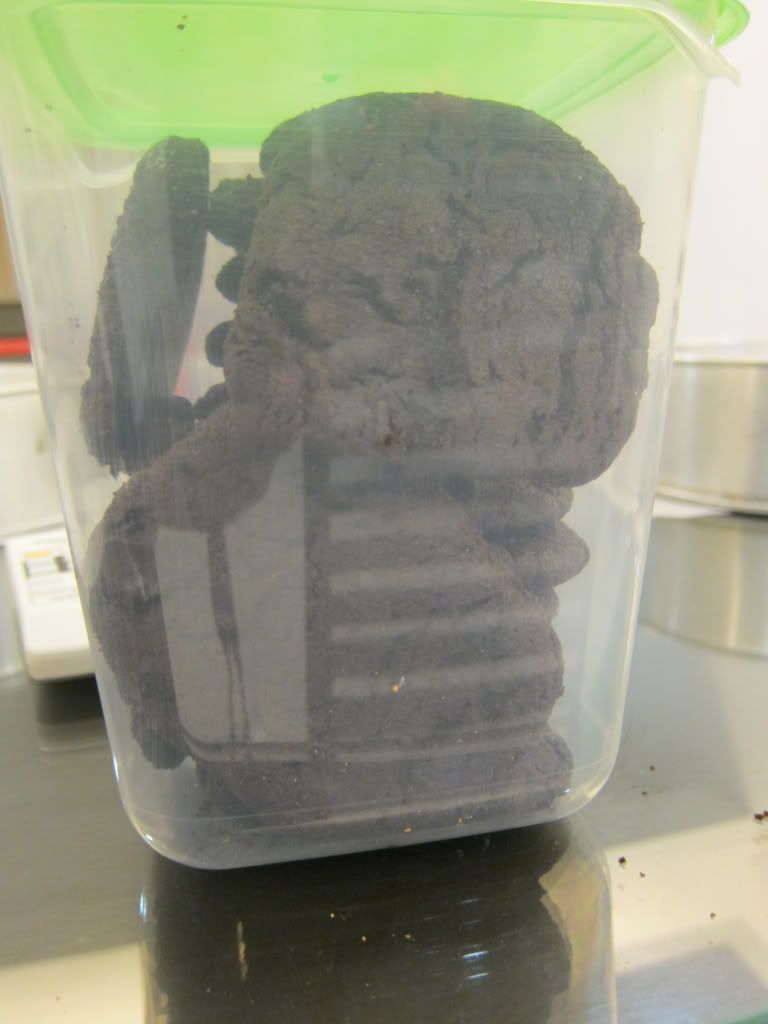
  8. Cool the cookies completely on the sheet pans before transferring to a plate or an airtight container for storage. At room temp, the cookies will keep fresh for 5 days; in the freezer, they will keep for 1 month.
**Bake Your Day Notes:I baked my cookies for exactly 18 minutes and they came out perfectly but watch in the last few minutes so that you don’t overbake them.
I followed the recipe exactly as written for these and we adored them. I wouldn’t change anything for the next time that I make them.

There you go. Good luck!

xoxo

The Fancy Pants Cheesecake


Nabilah had been craving for this cake since the first time I told her about it. She tried her hardest to find an event so that she can have the cake. Months. It took her months, till it was her baby sister's birthday!

The recipe is from Kate Shirazi, got her book as my birthday gift (Thank you Yong!).The original recipe had banana as its middle layer.Nabilah suggested to have something choclatey in the centre (she and her baby sister and some (un)lucky friends of thiers got to be my test mouse). Eventually, another birthday of a dear friend was due. Another experiment! yeay! I decided to dig into my  the fridge, and found some crunchie! Used crunchie to substitute the banana.


And I got to taste this one! I rarely eat the cakes that I made, but gurrrrlllll, this is good. Sweet, creamy, perfect for a quick fix for your sweet tooth. Not to mention the maltessers! Yummssss.

Recipe follows (with lil modification of Kate's version):
1/2 cup of original digestive biscuits (or hobnobs/graham crackers)
1/2 cup of oreo crunch (or any choc hobnonbs/graham crackers/digestive)
1/4 cup butter-melted
3/4 cup whipped cream
250gram cream cheese
1 teaspoon vanilla extract
100gram maltessers

Centre Layer
You can choose any fruits or any candy bar as you wish.
For banana, I used 1 1/2 - 2 large size banana, slice them up and pour lemon juice on top of it to avoid them from browning.
For crunchie, I used 1 1/2 bar, crushed to small pieces.
  1. Line and butter a 7inch springform tin, bottom and side.
  2. Crush digestive and oreo (using your hand or mixer or just stomp it with your roller pin in a plastic bag).
  3. Combine digestive and oreo with melted butter.
  4. Pressed the cookie mix at the bottom of the tin with the back of a spoon so it'll be really pressed. Refrigerate for 1 hour.
  5. Whip the the whipped cream with an electric mixer (top speed) until soft peak forms.
  6. Meanwhile give your cream cheese a gentle beating until it is smooth (spreadable form is the best).
  7. Fold in the cream cheese to the whipped cream or you can just mix the cream cheese into the whipped cream mixture until just combine.
  8. Insert vanilla extract. 
  9. Take half of the cheese mixture and spread evenly on top of the cookie base.
  10. Spread the centre layer (crunchie, banana or anything you wish).
  11. Spread the other half of the cheese mixture on top of the centre layer.
  12. Refrigerate for at least 3 hours (best overnight).
  13. Arrange the maltessers as you wish.
*Double the recipe for a 9inch tin!


Voila! Easy ay?  You can try having them with strawberries, mango etc. You can even substitue the maltessers to some other candy or choc!

Have fun dolls!

Laters. xoxo.

Sunday, 29 July 2012

Strawberry Vanilla Crumble Pie


Remember the strawberry madness week? Well this was another dish that I made during that week. It was ........ *dreaming face*.

Just look at that bubbly strawberry juice dripping out of the pan! And the smell of the kitchen when you open the oven to check on it, make you wanna eat it as soon as it comes out!

Drizzled a slice with some choc ganache. oimicorasonnn. *drool*

Another recipe from Whisk Kid, she just makes me salivate everytime I look at her post, and run to the store and get all the ingredients. Another easy one, have fun trying!

Pie Crust
6 Tablespoon (85g) butter
2 Tablespoon (30g) shortening
1 cup (142g) flour
1/2 teaspoon salt
4 Tablespoon cold water, more if needed
  1. Cube the butter and place it and the shortening in the freezer for fifteen minutes.
  2. In a medium bowl, combine the flour and salt. Add the frozen butter and shortening, and press with your fingers (or a pastry blender or a fork or a pair of knives. Its easier with forks!) until it is the texture of coarse meal. Add the water a little at a time and mix/knead just until incorporated.
  3. Wrap in plastic wrap and refrigerate (not freezer okay) at least 30 minutes. (Tip: You can start on your crumble while waiting for this).
  4. After 30 minutes, place the dough on the counter to soften for 5 minutes. On a well-floured surface, roll the dough until it is large enough to fit in a 9" pie tin - about 11-12" in diameter. As you roll, check often to see that the dough is not sticking to the counter and apply more flour as needed.
  5. Roll the dough around your rolling pin and lay it in the pie tin. Form a decorative boarder, if you wish. Place in freezer.
Crumble (which was adapted from Nicole at Sweet Peony)
1/2 cup (100g) brown sugar, packed
1/2 cup (71g)  flour
3/4 teaspoon cinnamon
4 Tablespoon (60g) butter, frozen and cubed
1/4 cup (25g) oats
  1. Combine all ingredients in a medium bowl and press until the texture of coarse crumbs. Place in freezer briefly while you prepare the pie filling.
Strawberry Vanilla Pie Filling
3/8 cup (74g) sugar
Scrapings of one vanilla bean/ 1 teaspoon vanilla extract
1/4 cup (35g) flour
2 Tablespoon cornstarch
1/2 teaspoon salt
500 grams strawberries (or around that..I used like 450, the other 50 grams went to my tummy..)
  1. Preheat the oven to 175degrees Celsius.
  2. Combine the sugar and vanilla in a bowl. (if using vanilla bean - press with fingers to incorporate)
  3. Stir in the flour, cornstarch and salt.
  4. When well-mixed, add the berries and toss to coat. Pour into frozen crust.
  5. Top with crumble. Bake until you see juices bubbling through the crumble in the center, about 1 hour and 15 minutes.

Don't you just wanna eat that???DON'T YOU?

Sunday, 15 July 2012

Tiramisu


My friends, they are like, my tester mouse. You know the ones that are used in the lab? But so far, they get to test eat yummy cakes. Not fair also. One day I should do a really bad one, like putting salt instead of sugar and get my camera ready!


I've never liked tiramisu before, because I dont really like coffee, until I know Starbucks and Coffee Bean (the fancy expensive stuff hehe), then it all begun. But weird, I would never buy myself a slice of tiramisu, maybe because of the bad 1st time experience.


Oh well, its another birthday celebration for 2 of the boys (gosh, i just realize that i actually have a lot of people's birthday I can experiments on..weee!), and one of them happened to mentioned his love for tiramisu, and the search for the perfect recipe begins.

Birthday boys with their cake.
My test mousies. See told ya. Happy faces eating cake. But I shayang these dweebs to the bits!

And it is not that hard to make too! Like stir stir stir, layer layer, dip dip, done! The recipe that I tried had the yolks to be cooked and chilled, but most other recipe doesnt require for it to be cooked. Its a matter of preference in the end. I've yet to try a cake version of tiramisu, this is the triffle version, the one that used lady fingers biscuits. And it is yummehhh! I had a lick of some spills, and I just had to swipe my fingers to the remaining leftovers from the bowl, this one is shoooo guuuud.
See, you only need these. I got my whipped cream zapping up in the mixer there.

This recipe is from Allrecipe, with slight adaptation (I excluded the Rum heehee) but I halved it as my bowl was only 8inch x 8inch.Ifyou have a big/deep bowl, by all means use the full measurement ya!

6 egg yolks
3/4 cup white sugar
2/3 cup milk
1 1/4 cups heavy cream
1/2 teaspoon vanilla extract
1 pound (about 500 grams) mascarpone cheese
1/4 cup strong brewed coffee, room temperature
2 packages ladyfinger cookies
1 tablespoon unsweetened cocoa powder

  1. In a medium saucepan, whisk together egg yolks and sugar until well blended. Whisk in milk and cook over medium heat, stirring constantly, until mixture boils. Boil gently for 1 minute, remove from heat and allow to cool slightly. Cover tightly and chill in refrigerator 1 hour.
  2. In a medium bowl, beat cream with vanilla until stiff peaks form.
  3. In a seperate bowl, whisk mascarpone into yolk mixture until smooth.
  4. Pour the coffee into a small bowl. Dip ladyfingers in the coffee and arrange in a bottom of a 7x11inch dish
  5. Spread half of mascarpone mixture over ladyfingers, then half of whipped cream over that. Repeat layers and sprinkle with cocoa. Cover and refrigerate 4 to 6 hours, until set. Its best to refrigerate it overnight. You can also shave some semi sweet chocolate and sprinkle sprinkle!
Good luck!